

Wood is a beautiful, strong, and natural material — but it has one major quirk: it moves. Changes in humidity, improper storage, or internal stress in the grain can cause wood to bow, cup, twist, or warp. Whether you’re building furniture, framing walls, or crafting home décor, understanding wood stress is essential to maintaining stability in your projects.
What Is Wood Stress?
Wood stress refers to internal tension within the wood fibers. This stress can be natural, due to how the tree grew, or introduced through external forces like drying or cutting. When that tension is released unevenly — for example, after cutting or during seasonal changes — the wood reacts by moving or distorting its shape.
Common Types of Wood Movement
Here are the most common ways wood can react to stress:
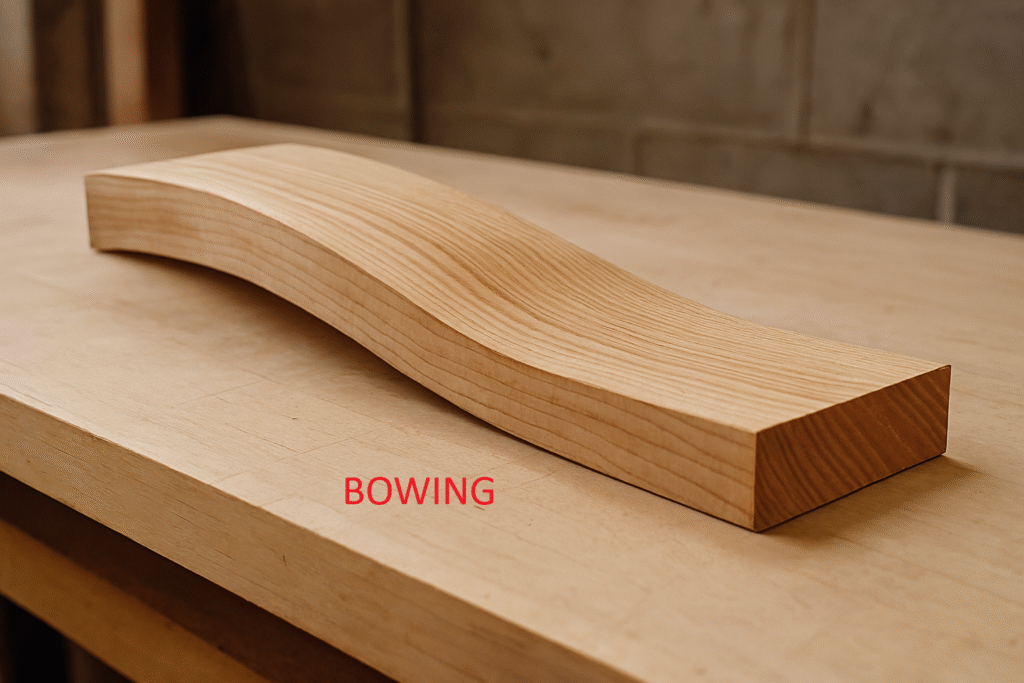
- Bowing: The board curves lengthwise, like a bow.
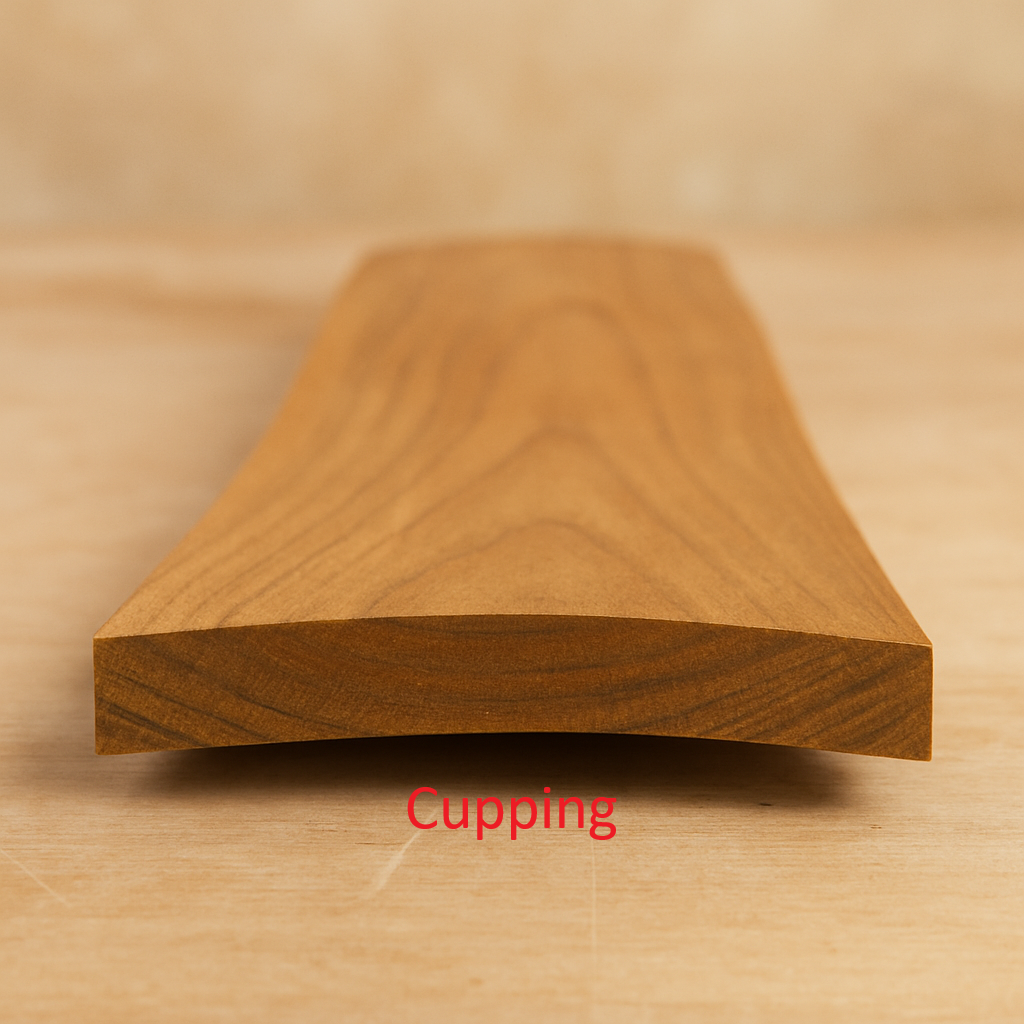
- Cupping: The edges of the board rise, forming a cup shape across the width.
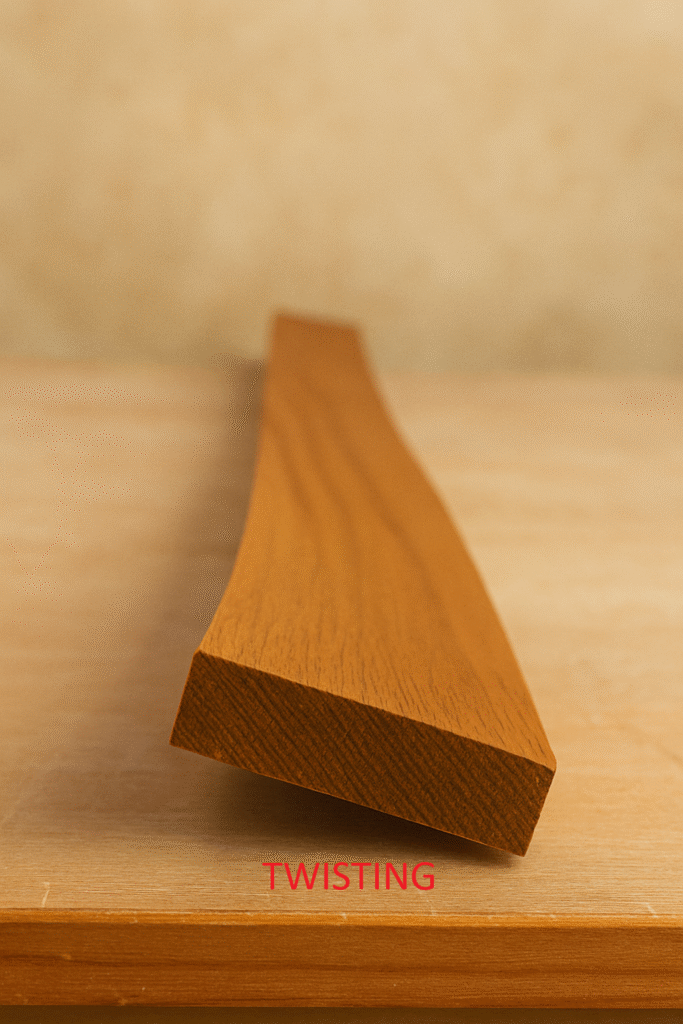
- Twisting: One corner of the board lifts or rotates, creating a spiral.
- Crooking: A curve occurs along the edge, creating a hook-like shape.
Causes of Wood Stress and Warping
- Moisture Imbalance
- Wood naturally absorbs and releases moisture. If one side dries faster than the other, it can cause the wood to warp.
- Poor Drying or Kiln Practices
- Improper kiln drying can trap internal stresses that show up once you cut or plane the wood.
- Improper Storage
- Leaving boards in a humid garage or leaning them vertically can introduce uneven stress.
- Tension Wood or Reaction Wood
- Trees grown on slopes or under stress can have abnormal fiber structure that retains tension even after sawing.
- Cutting Technique
- Rip-cutting a board can release built-up tension, causing it to bow or twist.
How to Identify Wood Stress Before It’s Too Late
1. Visual Inspection
- Look for uneven grain, knots, or discoloration. These often signal internal tension.
2. Flatness Test
- Place the board on a known flat surface. Any gaps or rocking indicate movement.
3. Look for End Grain Patterns
- Boards with arched end grain (closer to the pith or center of the tree) are more prone to cupping or bowing.
4. Light Cut Test
- Lightly joint or plane one side and observe if the board starts to shift or curve. If it does, it has internal stress.
How to Fix or Prevent Wood Warping and Bowing
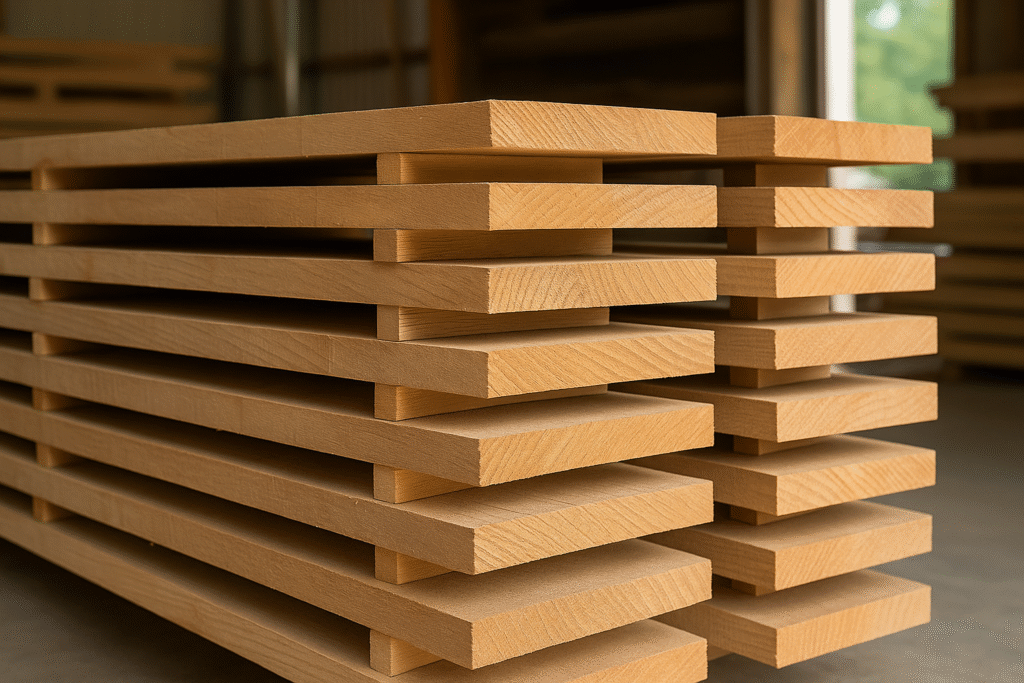
1. Store Wood Properly
- Stack boards flat with even support underneath.
- Use stickers (thin strips of wood) between boards to allow air circulation.
- Cover loosely to control humidity.
2. Acclimate Before Use
- Let the wood sit in your workshop for 7–14 days before working on it. This helps it adjust to the environment.
3. Use the Right Grain Orientation
- For furniture, alternate grain direction or use quartersawn lumber, which is more stable.
4. Seal End Grain
- Seal the ends of freshly cut boards to reduce rapid moisture loss, which can create imbalance.
5. Use Balanced Construction
- For panels or tabletops, use breadboard ends or battens to keep wide boards flat.
- Avoid using a single board across a wide panel when plywood or laminated boards may perform better.
6. Clamp and Flatten (Temporary Fix)
- Slight warping can sometimes be corrected by clamping the board flat with moisture and heat (like a damp towel and heat gun), though this is usually a short-term fix.
- 1. Identify the bow: Determine which side of the wood is concave (bowed-in).
- 2. Prepare the damp towel: Soak a towel in water and squeeze out excess moisture, so it’s damp but not dripping.
- 3. Dampen the wood: Place the damp towel on the concave side of the wood, ensuring good contact.
- 4. Apply heat: Position the wood in direct sunlight or near a heat source. The heat will help the wood fibers on the dampened side expand, pushing the wood back into shape.
- 5. Monitor and adjust: Regularly check the wood’s progress and reapply water to the towel if it dries out. It may take several days for the wood to flatten completely.
- 6. Consider clamping: For stubborn bows, you can add weight or clamps to the convex (bowed-out) side to encourage flattening as the wood dries.
- 7. Dry slowly :Once the wood is flattened, allow it to dry slowly and evenly to prevent further warping.
7. Milling Technique Tips
- Always remove equal amounts of material from both sides of a board when planing.
- When ripping tensioned boards, leave extra width and straighten later.
Conclusion
Wood stress is a natural part of working with a living material — but with proper understanding and prevention techniques, you can avoid costly mistakes and preserve the beauty and integrity of your work. Learn to read the grain, store wood wisely, and work with the material instead of against it.
Happy building!


Leave a Reply
You must be logged in to post a comment.